Step-by-step Guide to Install an SSL Certificate on a LiteSpeed Server
High-performing websites are crucial in the current era of increased internet usage, and it is an opportunity for businesses to connect with more customers. However, high-performing websites require reliable and secure web servers.
LiteSpeed web server boosts performance and scalability with event-driven architecture for enhanced content delivery. However, security can be an issue for LiteSpeed with increased cyber security threats. The Guardian cyberattack in December 2022 is a prime example of why you need to secure your servers to avert any cyber threat like ransomware.
One way to secure your servers is to install an SSL Certificate on LiteSpeed, which enables you to protect data exchanged between a server and a browser. It uses cryptographic encryptions to ensure information is scrambled into a string of random values unreadable to cyber attackers.
This article will focus on installing an SSL certificate and securing your LiteSpeed server.
How to Install an SSL Certificate on a LiteSpeed Server?
Installing an SSL certificate on LiteSpeed begins by generating a certificate-signing request (CSR). It is a request that you submit to the certificate authority (CA) to issue the SSL certificate. However, you must first choose the most suitable type of certificate and buy it from a trustworthy CA.
Step 1: Buy an SSL Certificate.
Choosing the right type is crucial to install an SSL certificate on the LiteSpeed server. For example, if your organization has multiple subdomains, you need a wildcard SSL certificate, enabling you to secure all of them with a single certificate.
Similarly, you can choose a multi-domain certificate if your organization has multiple primary domains. Here are some types of SSL certificates to install on the LiteSpeed server,
- Domain Validated (DV) Certificates are the most basic type of SSL certificates, verifying only the domain ownership. It is suitable for personal websites, blogs, or non-sensitive web pages.
- Organization Validated (OV) Certificates authenticate domain ownership and the organization details, including the company’s name, location, registration date, and more.
- Extended Validation (EV) Certificates offer the highest level of trust and authentication. EV certificates are issued to organizations that pass a thorough verification process to confirm their legal and physical existence.
- Single Domain Certificates can help you secure a single domain name, such as “www.example.com.” and is suitable for the security of a specific website.
Step 2: Generate CSR
You can generate CSR on LiteSpeed using an OpenSSL tool. Use the following command for private key generation,
Openssl genrsa –out server.key 2048
Similarly, you can use the following command for CSR generations,
Openssl req –new –key server.key –out server.csr
The command will prompt you to answer key questions like,
- What is the common name or FQDN (fully qualified domain name)?
- What is the full legal name of your organization?
- Which is the locality or city where you are located?
- What is the country’s name, state, or province where your organization is located?
Once you provide the details, CSR will be generated and saved in your specified directory. Further, you can open the CSR file on a notepad and copy all the code, including,
—–BEGIN CERTIFICATE REQUEST—–
And
—–END CERTIFICATE REQUEST—–
Paste the code on the generation form on CA’s website or dashboard, and complete the submission process.
Step 3: Unzip the .zip Folder
Once you submit the CSR, CA will verify the organization’s details and issue an SSL certificate. You will receive all certificate chain files in a bundled folder. Unzip the folder and download the certificate files. Further, you must convert the files into compatible formats and save them locally on your device. Next, you must add a listener to the LiteSpeed server to install the SSL certificate.
Step 4: Add a New Listener
Log in to your LiteSpeed WebAdmin console and click on the “Listeners” and then “Add.”
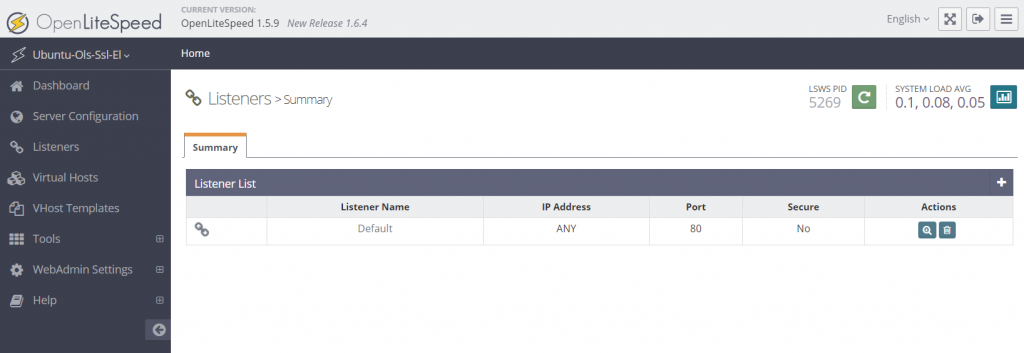
You need to configure the Listener by adding the following settings,
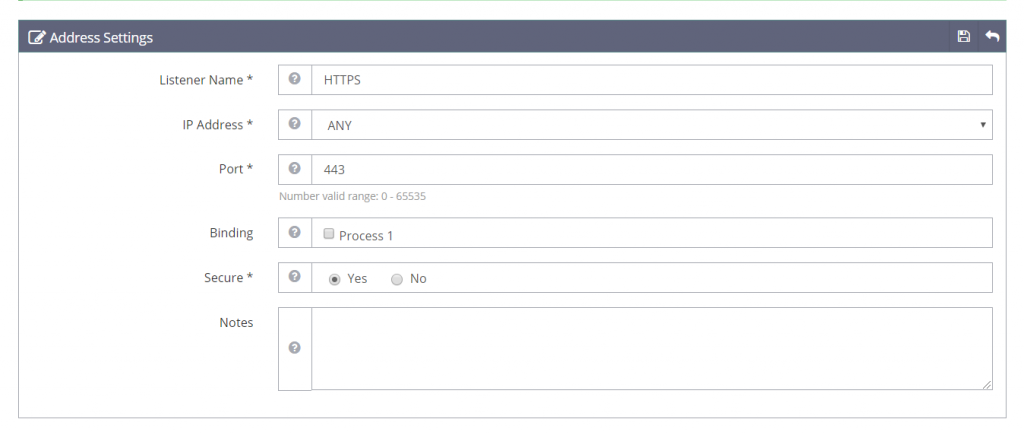
- Listener’s name(a friendly name)
- IP Address which you can select from the dropdown menu or manually enter a unique IP=port combination
- Port 443/8443
- Select “Yes” for the “Secure” option
- Click “Save.”
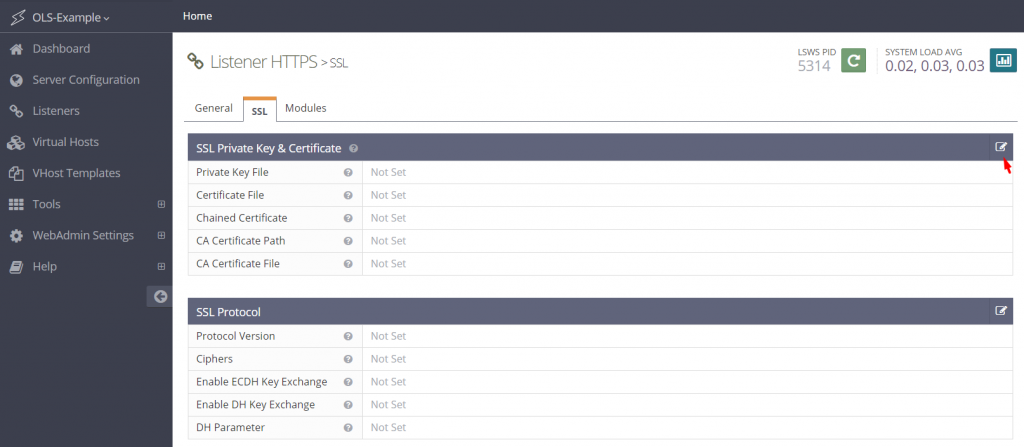
Now, click Listeners and select the name of the Listener you configured. Go to the SSL tab under the newly configured Listener and click the “Edit” button in the “SSL Private Key & Certificate” section.
Step 5: Add the Files related to Your SSL Certificate
Now that you are on the SSL tab, you need to configure the SSL certificate file paths to add the certificate and private key files,
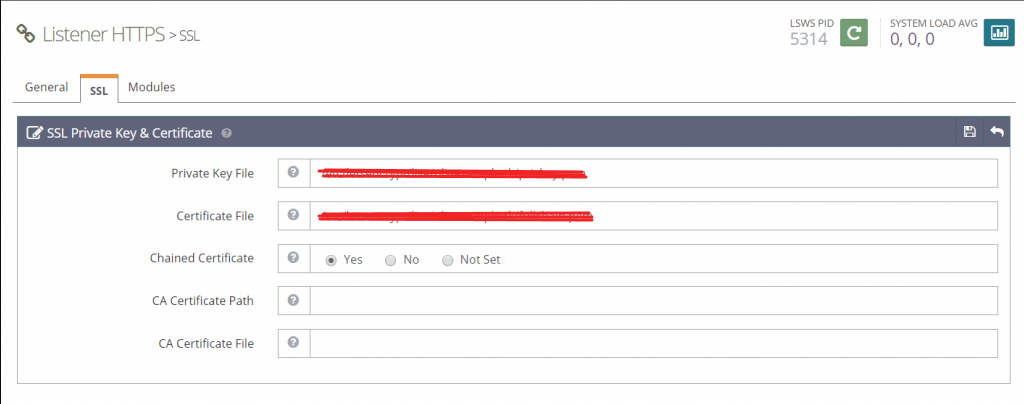
- Private Key file path, which leads to the source file, saved on the directory.
- Certificate file path, which indicates the source where the file is located
- Intermediate certificate file path
- Select the path to the “directory” for the option “CA Certificate File.”
- Click “Save.”
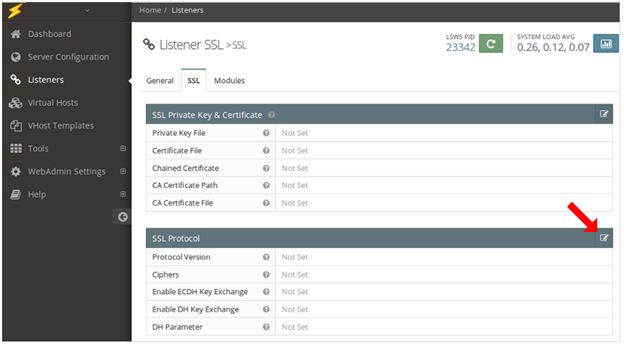
Step 6: Navigate to the SSL tab & choose the Protocol Version.
Click the “Edit” button in the SSL Protocol section and select the TLSv1.1 and TLSv1.2 protocol versions. Next, click “Save.”
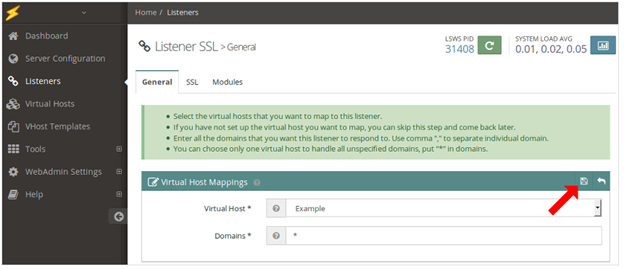
Next, go to the “General” tab under the newly configured Listener and click the “Add” button to map the virtual host.
Step 7: Set Virtual Host & Enter Your Domain.
You can map the virtual host by selecting an option from the drop-down menu of “Virtual Host” drop-down menu on the “General” tab. After choosing the virtual host, add all the domains and click save.
Step 8: Restart Your LiteSpeed Server
Lastly, go to your “Dashboard” and click on the “Restart” button, and your process to install the SSL certificate on LiteSpeed will be complete.
Verify the Installation of the SSL Certificate
To verify whether the SSL certificate installed is working or not,
- Open the browser
- Enter your website URL in the address bar with “https://”
- Press enter and look for a padlock sign in the browser’s address bar.
- If there is a padlock sign, click on it and check for details like certificate issuer, validity dates, and encryption strength.
You can also use our free SSL checker tool to verify your SSL certificate installation.
Where to Buy Trusted SSL Certificates for Your Website?
You can buy SSL certificates from reputable, trusted sources offering multiple options. Some of the online SSL certificate providers have options from leading CAs like,
Some SSL certificate providers provide advanced security features, a money back guarantee, and renewals on-demand for business.
Conclusion
Server security is crucial and helps improve the user experience by ensuring user trust. You can buy SSL certificates from trustworthy CAs and install them on the LiteSpeed server. It will help ensure data exchanged between the server and browser is secure, ensuring no man-in-the-middle attacks. We have discussed the entire process to install an SSL certificate on LiteSpeed. However, the steps may differ depending on your project requirements.
Other Installation Guide: