A quick guide to install SSL certificate on Microsoft Exchange Server 2019, 2016, 2013.
The exchange server becomes crucial to enhance collaborations across Microsoft platforms. With SaaS capabilities and many features, Microsoft Exchange Server has been popular among developers.
Windows is one of the most popular operating systems, and Exchange Server allows developers to optimize its usage. It enables optimal and centralized messaging along with vital operational features.
When it comes to security, Microsoft Exchange Server could be better. In 2021, a Chinese group called Haffnum attacked Exchange Server, exploiting the zero-day vulnerability. These vulnerabilities included CVE-2021-26855, CVE-2021-26857, CVE-2021-26858, and CVE-2021-27065. Further, Microsoft had to release several updates to counter such attacks and resolve vulnerabilities.
Therefore, there is no denying that you need to have security measures when such attacks happen. One of the best ways to ensure security is by using Exchange SSL certificates. We will discuss how to install SSL certificates on your Exchange server. Let us first discuss how to install an SSL certificate on Exchange Server 2013 and 2016.
How to Install SSL certificate on Microsoft Exchange Server 2013 and 2016 version?
Any organization or developer’s first step is getting an SSL certificate. You can request the SSL certificate by generating a certificate-signing request (CSR). An SSL certificate scrambles the data and makes it anonymous for hackers. It secures data transmission and allows organizations to avoid a data breach.
SSL certificates are based on an asymmetric encryption approach. Therefore, there is a security key pair for the encryption and decryption of the data. However, there are types of SSL certificates that you can opt for according to your needs.
For example, choosing an Exchange Server SSL certificate makes more sense if you want to secure Microsoft Exchange Server. Once you submit the CSR and credentials, a certificate authority will validate the credentials and issue an SSL certificate.
These credentials will include business location, legal name, legitimacy documents, and more. Once the certificate is issued, all the files will be sent to you through email, and you can download the file on the device. Now it is time to install the Exchange SSL certificate.
First, copy the certificate files onto the server and start the installation process. Open the network share folder on the Exchange server where the certificate files are present. Next, upload the intermediate certificate gd_iis_intermediates.p7b and the principal certificate in .crt format.
Now, let us discuss adding a Snap-in to the MMC.
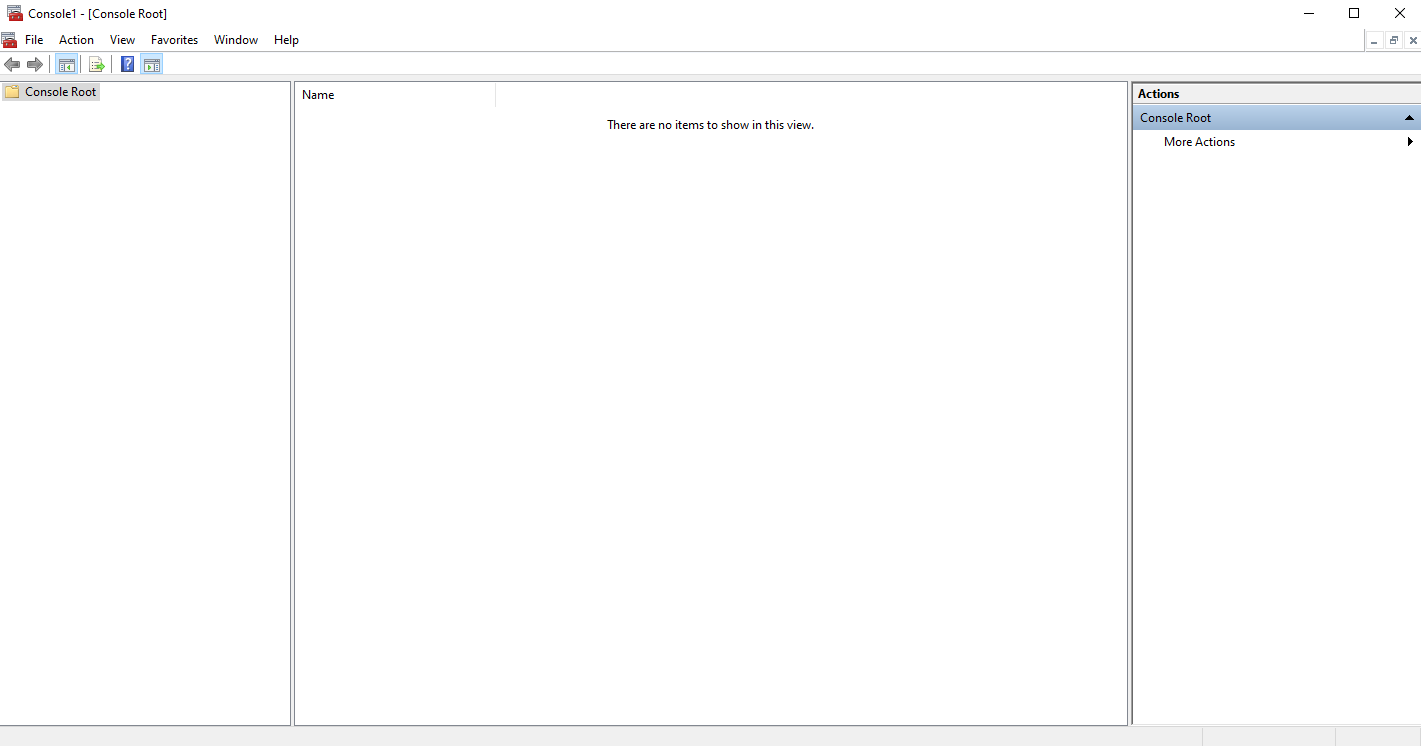
Step #1: Open the start menu and click on run.
Step #2: type in MMC and click ok to open Microsoft Management Console.
Step #3: Click on the file and select add or remove option.

Step #4: Click on the certificates options
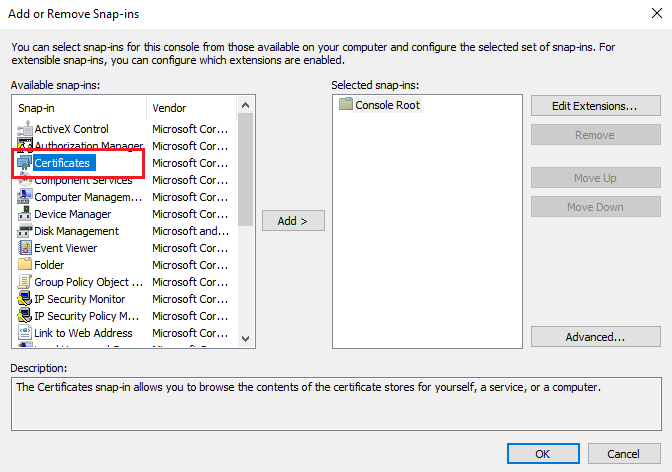
Step #5: Now click on add, and you will be asked to get the certificate file from your user or computer account.
Step #6: Next, choose the local computer option and add the certificate from the local device.
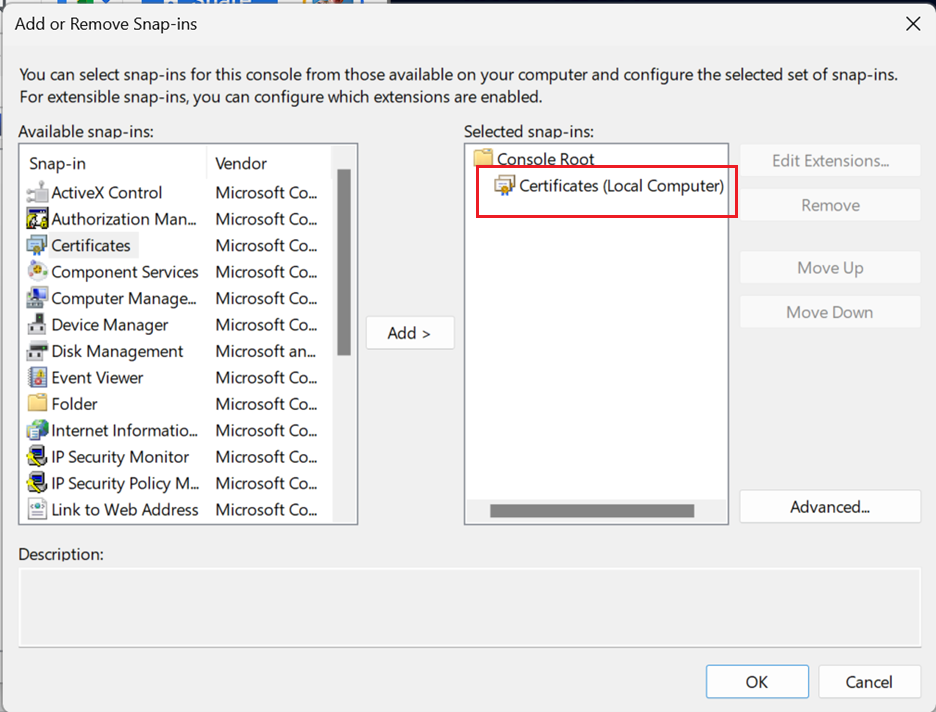
Step #7: Click close on the add standalone snap-in window and click ok for add/remove snap-in
Now that we have added a snap-in, let us import the intermediate certificate.
Step #8: Open MCC and expand the Certificates section
Step #9: Clicks on the intermediate CA folder and find “All Tasks”
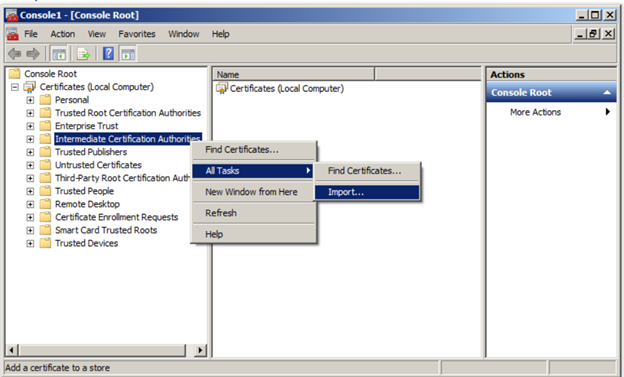
Step #10: Next, click on Import, and a new window will open.
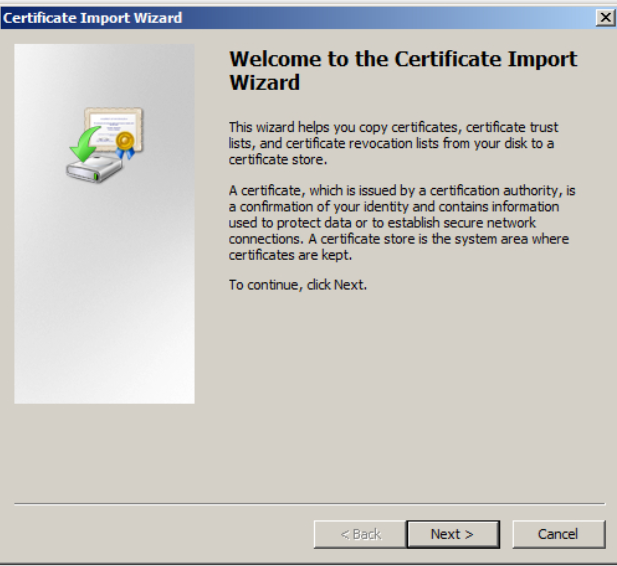
Step #11: Click ‘Next’ and browse uploaded intermediate certificates.
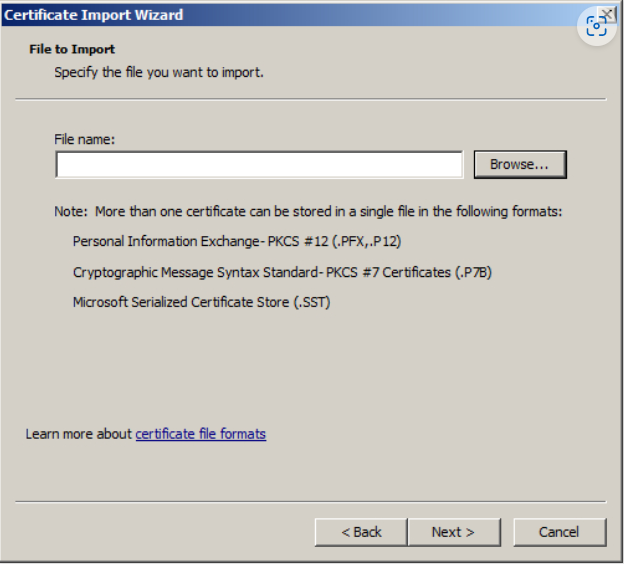
Step #12: If you have PKCS-7 file then select you can ‘Automatically select the certificate store based on the type of certificate’. Now, Click Next.
Step #13: Click on Open, verify information of certificate, and then click on Finish.
Step #14: Close the window, and you will receive a notification that the import was successful.
To import the root certificate, right-click on the Trusted Root Certification Authorities store >> All Tasks >> Import.
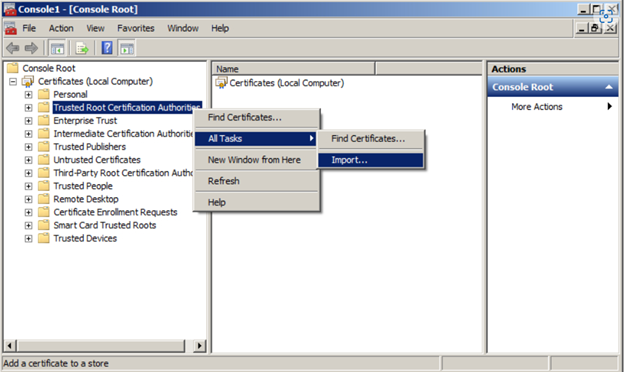
Then follow the steps 10-13 to complete the Certificate Import Wizard for a root certificate:
Now that the intermediate certificate has been imported, it is time to install the SSL certificate in EAC.
Step #1: Access the Exchange Admin Center by typing https://localhost/ecp in the browser.
Step #2: log in to the user account with your ID and password
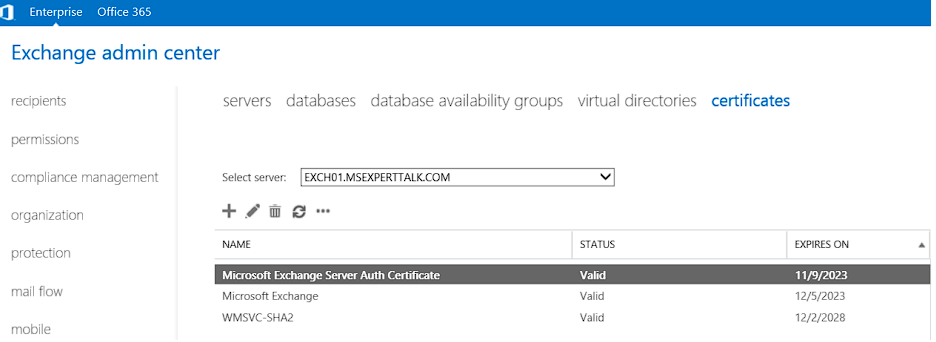
Step #3: On the left-hand sidebar, select Servers
Step #4: At the top menu in the main section, select the Certificates option.

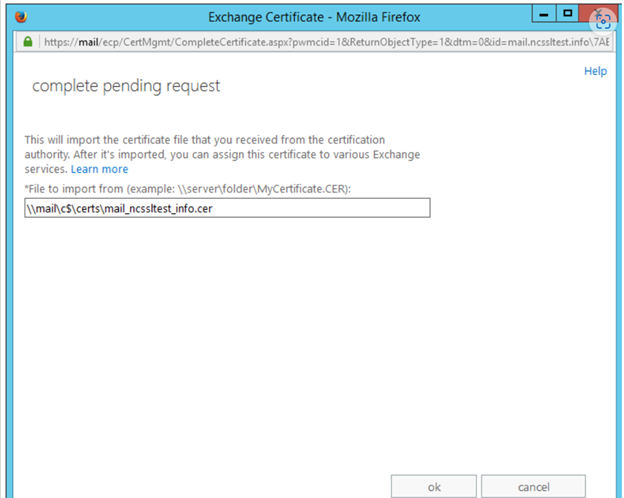
Step #5: Select your certificate, which shows the pending status in the main panel.
Step #6: A new window will open, type out the file path, import the .crt file from the field, and click OK.
Step #7: Go to the main panel of the Certificate page and select the certificate with valid status
Step #8: Next, click on edit your certificate from the list of certificates
Step #9: A new window will open where you need to find the exchangecert, and on the left, click on Services.
Step #10: Next; select the services for which you want the SSL certificate enabled, like SMTP, IMAP, POP, and IIS.
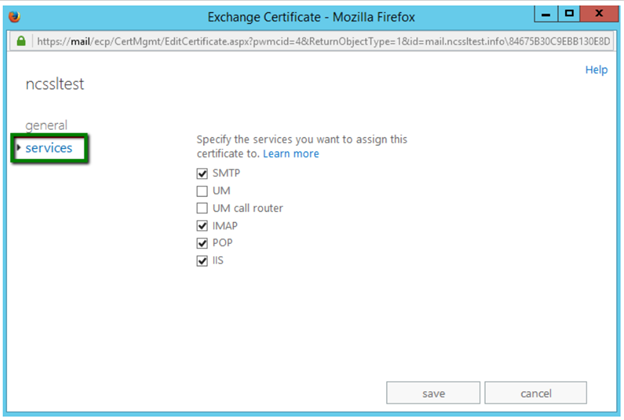
Step #11: Click save, and the SSL certificate will be installed. It shows Valid status
Now that we know how to install an SSL certificate on the Microsoft Exchange Server 2016 or 2013, it is now time to discuss the systematic installation process of the 2019 version.
How to Install SSL certificate on Microsoft Exchange Server 2019?
For Microsoft Exchange Server 2019, you need first to generate the CSR. Therefore, here is a process to follow for CSR generation.
Step #1: Go to EAC, click on Servers and find Certificates
Step #2: Select a server from the list and choose the Microsoft Exchange Server certificate
Step #3: A new Exchange certificate wizard will open. On this wizard, create a new certificate request file page. You will get two options from which choose the option “Create a request for a certificate from a certificate authority.” Further, verify the request for the certificate and click ‘Next’.
Step #4: Provide a friendly name for your certificate and click ‘Next’.
Step #5: Browse the certificate stored on the server you want to install and click ‘Next’.
Step #6: You will have a new window that indicates the domain names you want to assign for the certificate, Click Next.
Step #7: Select the domain and click ‘Next’.
Step #8: Fill up the details as asked in a new window for your organization, like legal name, city, and others.
Step #9: Provide a share folder location for the CSR and save it .req Extention
Once the CSR is generated, and you have the SSL certificate issued next step is to install it.
- Go to Exchange Admin Center and log in with your password and ID
- On the left-hand side of the window, find Servers
- Further, find the “Certificates” on the Server page
- In the next window, select the path to your SSL certificate file
- Now enable the certificate by going back to the Exchange admin
- Map the services you want to install an SSL certificate for, and installation will be complete.
Further, you can also use the command prompt through Microsoft Shell Management to install the Exchange SSL certificate. Use the following code for installation,
Import-ExchangeCertificate -FileData ([System.IO.File]::ReadAllBytes(‘
Conclusion
Microsoft Exchange Server is key to collaborations and efficiency across Windows OS. However, if you do not have enough security, it can lead to data theft. One of the most prominent attacks is MITM, where hackers get access to data exchanged between two systems. So, get an SSL certificate and install it to protect your Exchange Servers from malicious attacks.
Recommended Reading: