A Guide to Install SSL/TLS Certificate to Microsoft IIS Servers(8/8.5/10).
Internet Information Services (IIS) are feature-rich web servers that you need to host ASP.NET web applications and static websites. It runs on a Windows system and serves HTML pages or files per user request. Not just for the hosting of static websites, you can also use IIS as an FTP server, host Windows Communication Foundation(WCF) services, and even host web apps built on PHP.
We know that Hypertext Transfer Protocol (HTTP) is the protocol that web servers use to exchange information. With a Secure Sockets Layer (SSL) certificate, you can secure the communication between the web server and the user’s device.
According to a report by Forbes, 2020 broke records in terms of cyber-attacks and data thefts across the world. So, there is no denying that it becomes vital for your websites to be secured, and SSL certificate is one of the best options. Here, we will guide you on how to install SSL certificate in IIS 10, IIS 8 server, and IIS 8.5.
Let’s start with a guide to answering, “how to manually install an SSL certificate on my IIS 8 server?”
Manual Installation of SSL certificate on IIS 8 Server
This guide will help you install an SSL certificate for your primary domain, and if you have more than one domain or server, you will have to install certificates on each of them individually. Before we start with the installation process, here are some pre-requisites.
What do you need to manually install an SSL certificate on my IIS 8 server?
The first thing you need will be your certificate file which you can download from the account dashboard. You may have also received from the certificate authority(CA). For SSL certificate issuance from a CA, you will need a Certificate Signing Request (CSR) which is a coded text containing your information created on the webserver.
Further, you will also need an intermediate certificate that allows the devices interacting with your webserver to identify the CA that issued the SSL/TLS certificate. There will be a separate folder with “Intermediate certificate(s)” or a CA bundle. If it does not come with an SSL certificate or is not present in the ZIP folder, you will have to download the right CA bundle for your certificate.
Next, you will need a private key that you used initially to generate the CSR request to issue an SSL certificate. It will be on your server, and in the case of the Microsoft IIS server may not be visible easily. However, your server will be tracking the private key despite being hidden.
Now that we know the pre-requisites let’s start with the installation process.
Step #1: Launch IIS
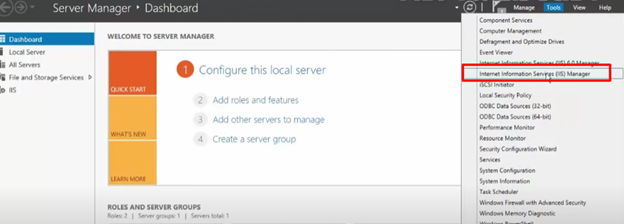
You can go to the “Control Panel” for launching the IIS manager and select the “System and Security” option. Further, choose the option of “Administrative Tools” and then select “Internet Information Services (IIS) Manager.”
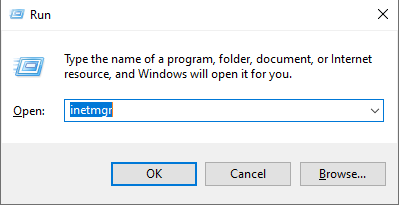
Another way to access the IIS manager is by opening the “Run” command on your computer and entering inetmgr. Once you hit OK, you will access the IIS manager.
Step #2: Select the server.
On the left side of the window, you will find a connection menu showing the server’s name, which you can select to install the SSL certificate.
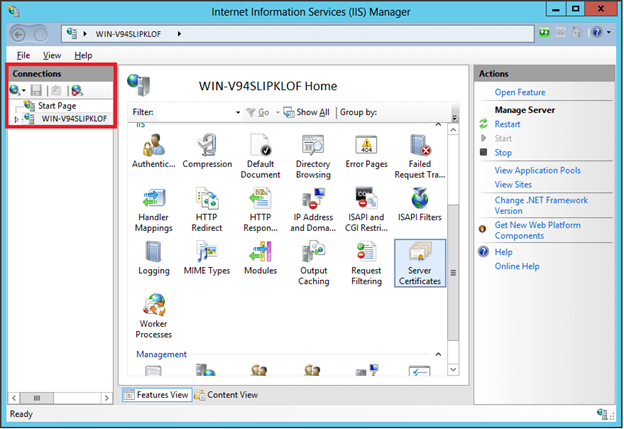
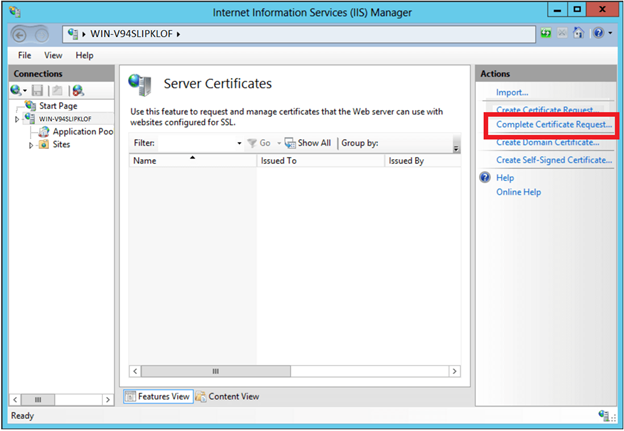
Step #3: Add a server certificate.
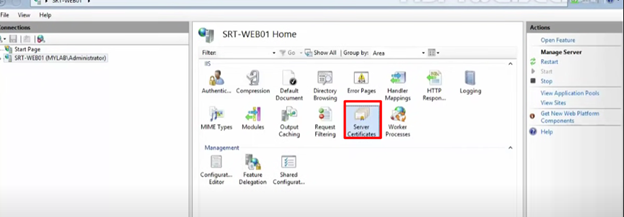
You can click on the “Server Certificate” located at the menu’s center beneath the security section. Further, in the server certificate window, you will get an option on the right side menu called “Complete Certificate Request.”
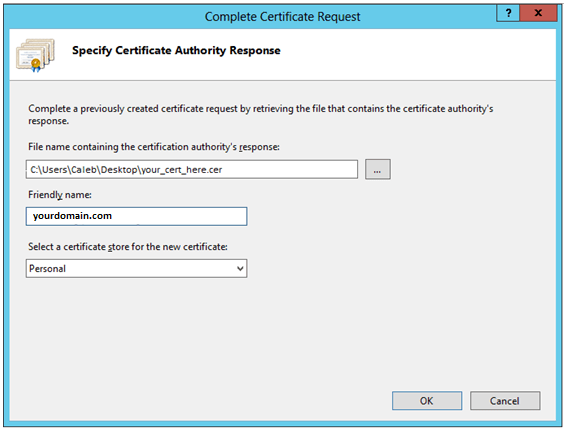
Next, you will see a window with the option to browse your certificate. Click on browse and upload the certificate to the server.
Step #4: Rename the certificate.
Rename the certificate uploaded on the server with your CA’s name, which will further help you identify the file. Also, select a personal option for your certificate store. Next, you need to click OK button, and your certificate will appear in the server certificate list after refreshing.
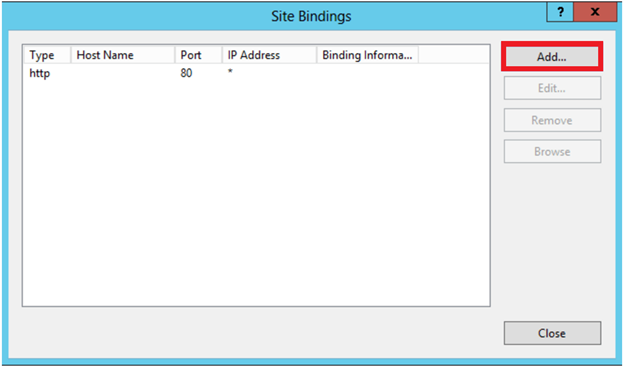
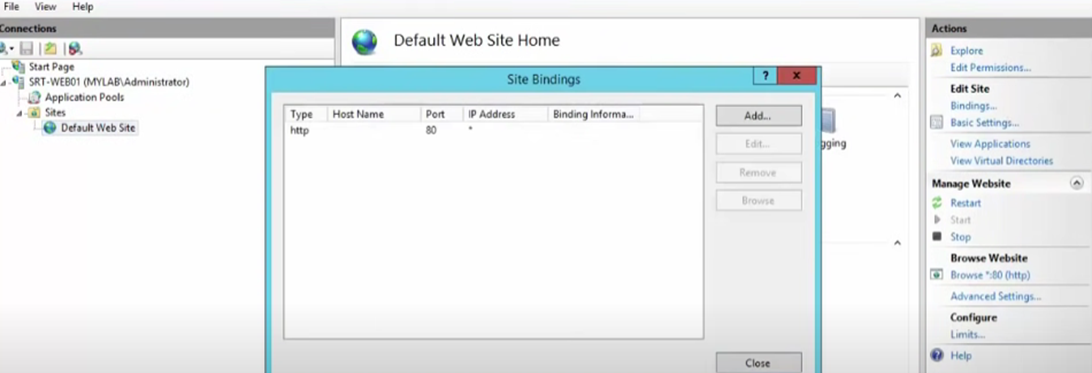
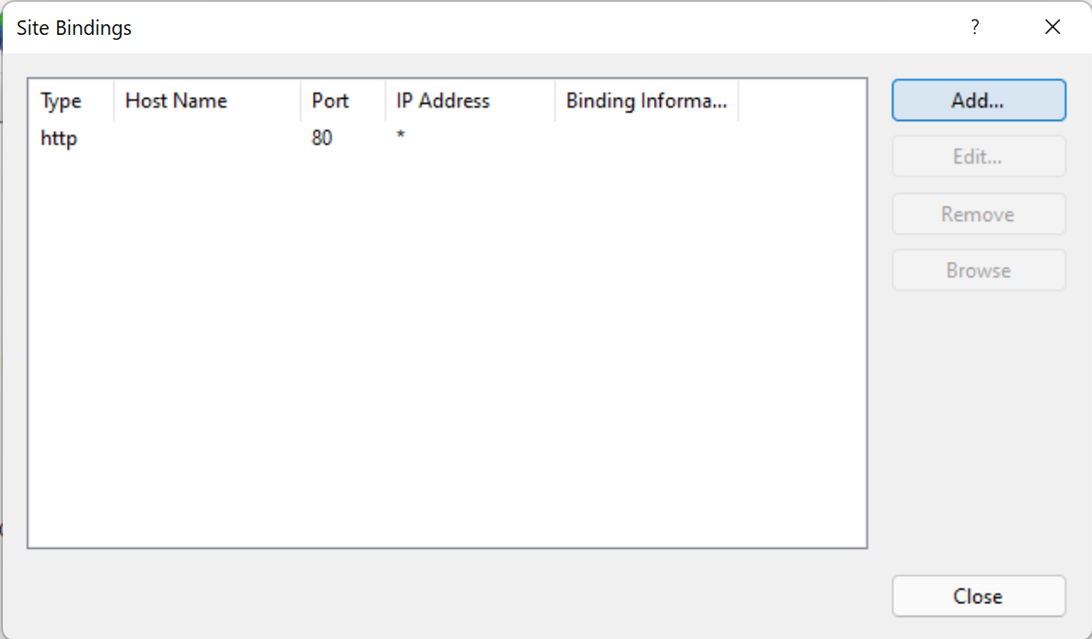
Step #5: Binding your website
There is an Action menu on the right-hand side from which select the “Site Bindings” option. Now, you can add a new certificate to be bound with the website. For making changes to the existing certificates, you can click on the “Edit” option.
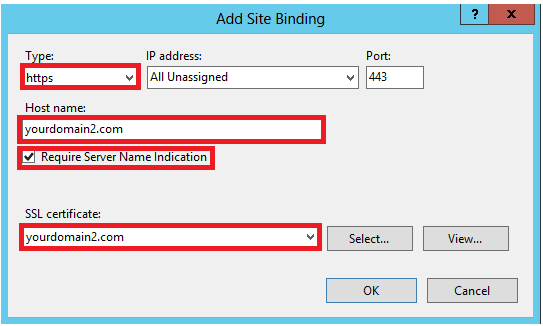
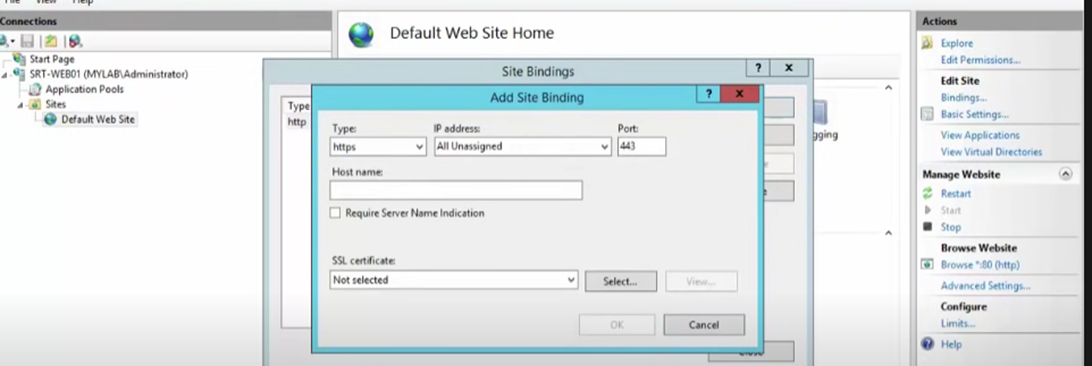
Further, you will have to add some information for adding the certificate for the binding process,
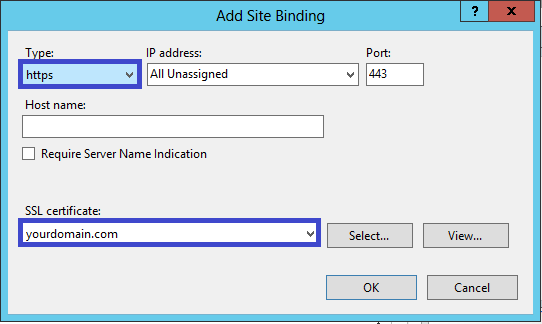
- Type of certificate- Choose “HTTPS” for binding of SSL certificate
- IP address- If you don’t have a specified address, select the option “All Unassigned,” If you have several IP addresses, you need to set the one for which the certificate needs to be bound.
- Port- 443 for HTTPS protocol
- Certificate- Select the name of your SSL certificate that you named while adding to the server and confirm it through the “view” option.
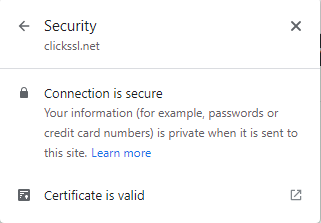
After filling in all the details, just click “OK,” and your SSL certificate is bound to the website. You need to restart the server to complete the process. You can further check whether your certificate is working or not by visiting the website. You can see a padlock, and when you click on it, you will find an option, “Connection is Secure.”
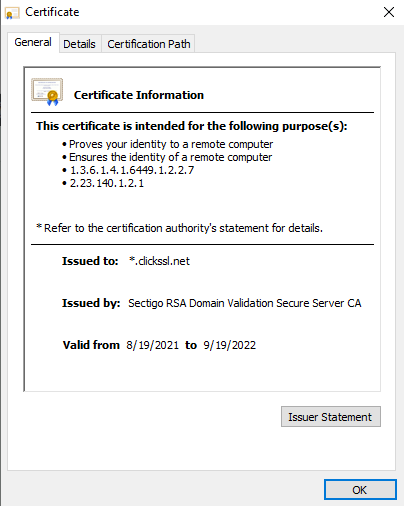
Click on it, and you will find another option called “Certificate is valid,” where you can click and see all the details regarding the SSL certificate. Now that we have successfully answered the question “how to manually install an SSL certificate on my IIS 8 server” for your primary domain let’s discuss what to do if you have more than one domain with multiple certificates.
Manual installation of multiple SSL certificates using SNI
The manual installation of multiple SSL certificates on the IIS 8 server can be processed using Server Name Indication(SNI). It is essential to understand that the above process we already discussed will be the same for each certificate you install.
However, once you install the first SSL certificate and follow the process we already discussed, you can complete the installation of additional certificates through the same steps. The only difference will be the final, binding process where you will have to fill in all the details and check the box for “Require Server Name Indication.”
Once you click “OK,” the additional certificates will be bound to the live website. Further, you can repeat the entire process for any other certificates.
From IIS 8 to the next iteration, IIS 8.5, several feature changes have been enhanced logging and others. However, if you are thinking about the Installation of a TLS certificate in IIS 8.5, here is a comprehensive guide.
Process for Installation of TLS certificate in IIS 8.5
Installation of TLS certificate in IIS 8.5 process begins with a CSR request for your TLS certificate, which you can generate from the web server, and after due validation from CA, it will be issued. Next, you need to click on the IIS manager tool on the server management menu.
Next, you can expand the site’s menu to open the default website home window.
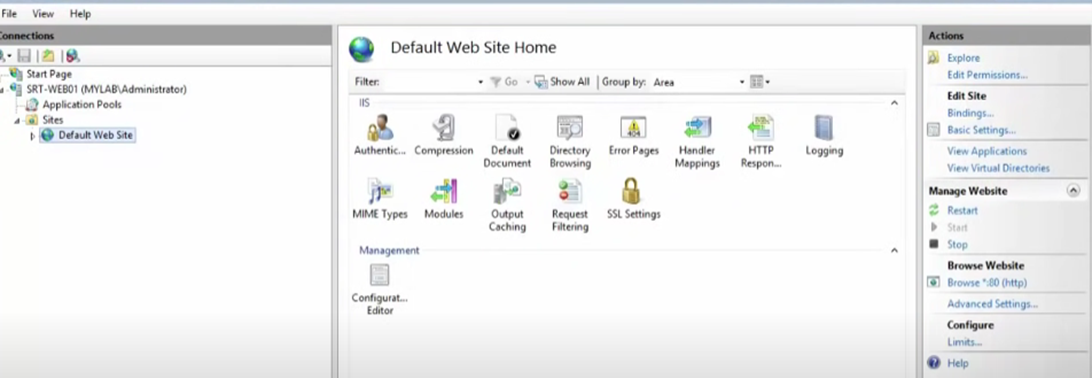
Now from the left-hand side collections menu, click on the computer’s name, and you will reach a window where there will be an option, “server certificates.”
Now click on the “Create Certificate Request” option, and you will receive a wizard.

There will be an option to browse your certificate file from the computer and add it to the wizard with a familiar file name which you can choose to be the CA’s name.
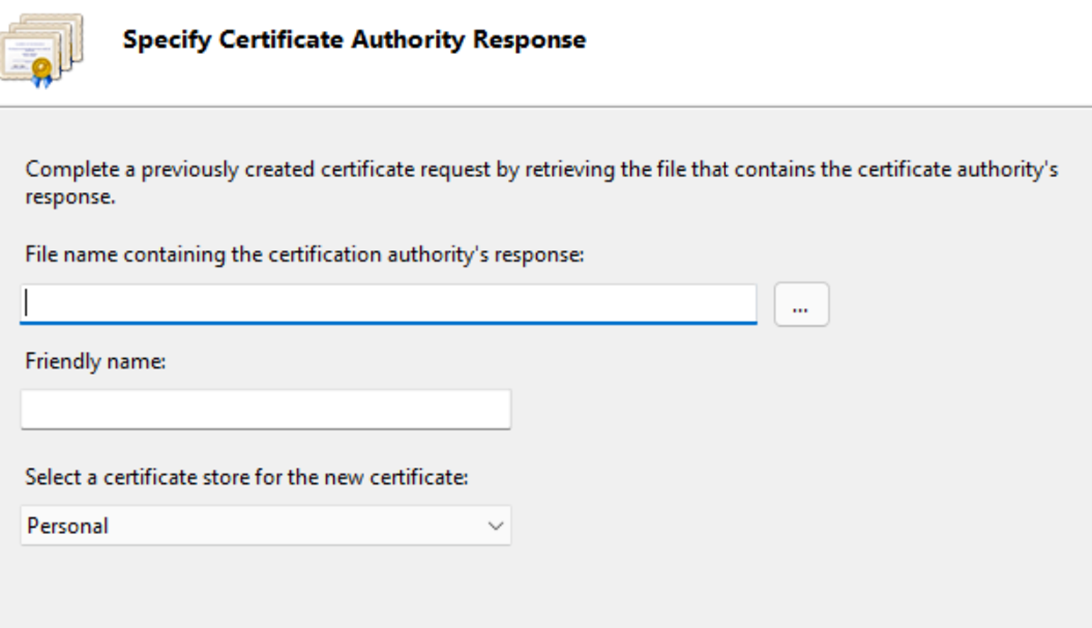
Further, choose personal for the certificate store or web hosting if your hosting service provider issues the certificate. Now click on “OK,” and the certificate will be added.
Further, you can bind the certificate to your live website through the “Bindings” option, which you can find by expanding the sites folder on the communication option. Once you click on “Bindings,” a wizard will open with an option to add the certificate.
When you click on add, another wizard opens where you have to fill in the details like,
- Type-“HTTPS”
- IP address- If you don’t have a specified address, select the option “All Unassigned” or set the one you already have.
- Port- 443
- Certificate- Select the name of your SSL certificate
Click on the “OK” to complete the binding process. Similarly, you can add the individual certificate to your website through the same process. However, if you want to add multiple SSL/TLS certificates to IIS 8.5 server, you can use the SNI option during the binding process.
How to install SSL certificate in IIS 10?
Coming to the modern windows systems with IIS 10 servers, there is a slight difference in the entire process of installing certificates. So, let’s discuss the approach on “how to install SSL certificate in IIS 10?”
Installation of SSL certificate and binding process on IIS 10 server
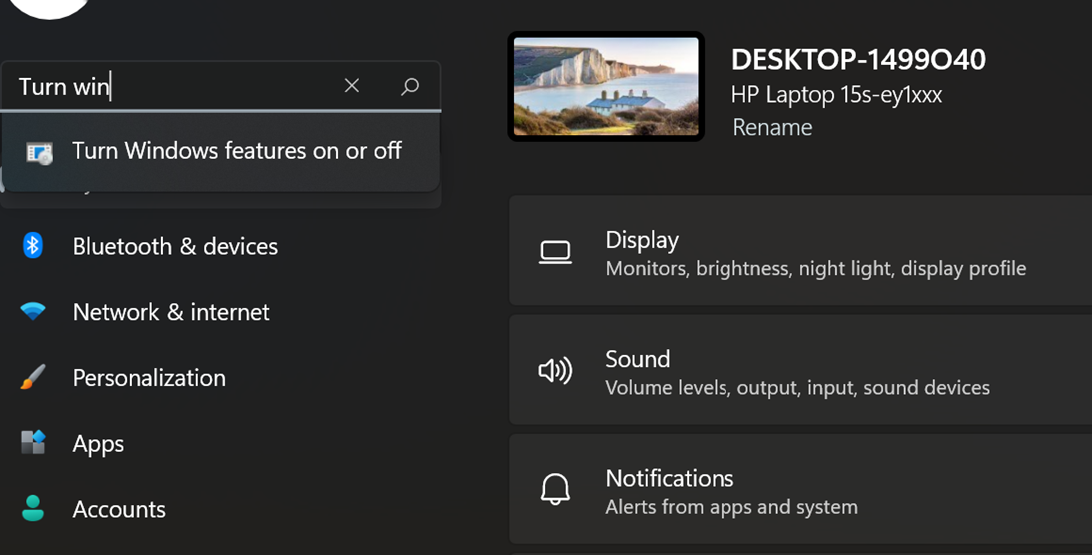
Now, if you are using Windows 10 or 11, the chances are that the IIS manager is being disabled by default. So, first, you need to go to your settings and search for the option, “Turn Windows Features ‘On’ or ‘Off.”
Click on the option, and a new window will open with several legacies and other features that are turned off by default.
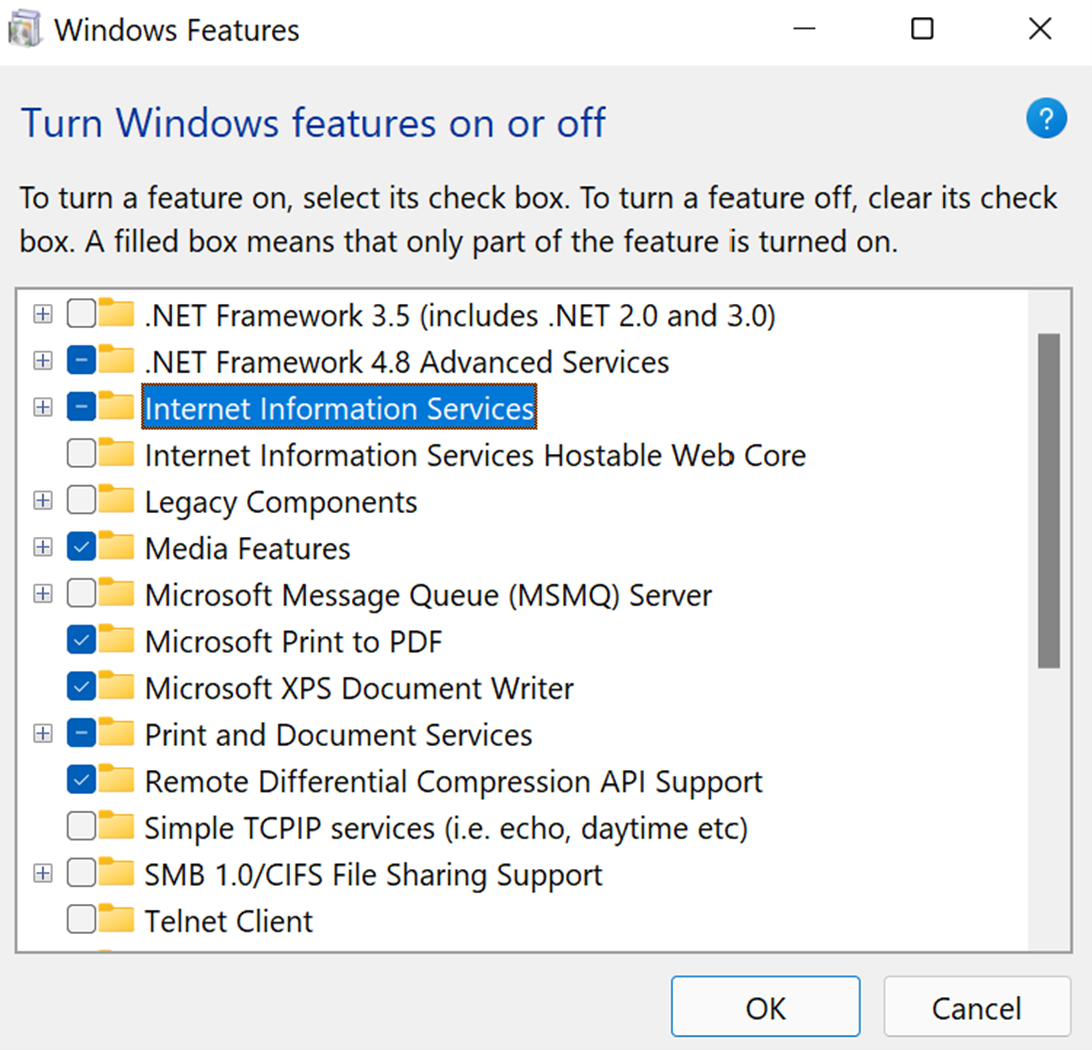
Click on the Internet Information Services and click “OK” to start the IIS manager feature. For some computers, it may ask you to restart the system. Now that your IIS manager feature is on, find the “Run” command and open it.
Next, click on the “OK” option, and you will see the IIS 10 manager window open. Now on the left-hand side, you can find the connections menu, and on clicking the computer’s window, you will find a window with the option, “Server Certificate.”
Select the “Server Certificates” option, and a new window will open, where you need to click on the “Complete Certificate Request” from the action menu on the right.
A new wizard will open where you need to upload the certificate file that you downloaded after issuance from your CA. For the issuance of the certificate, you also need to generate a CSR, which you can generate from the action menu.
Further, it is essential to understand that you need to upload a .p7b file which may not be visible without changing the file name extension to *.* from *.cer in the field name. Next, add a friendly name to your certificate or the one provided by CA and select “Personal.” Now Click “OK” to install the SSL certificate to your IIS 10 server.
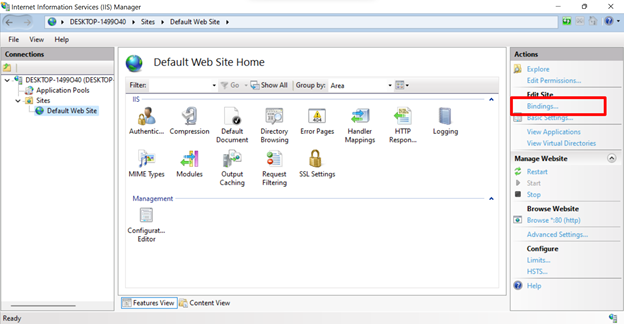
For the binding process, expand the “Sites” folder to find the main window, where you will find the “Bindings” option on the action menu.
Next, click on “Add” to the wizard that opens after clicking on the “Bindings” option.
A new wizard will open with different fields that you need to fill and an option to add the certificate.
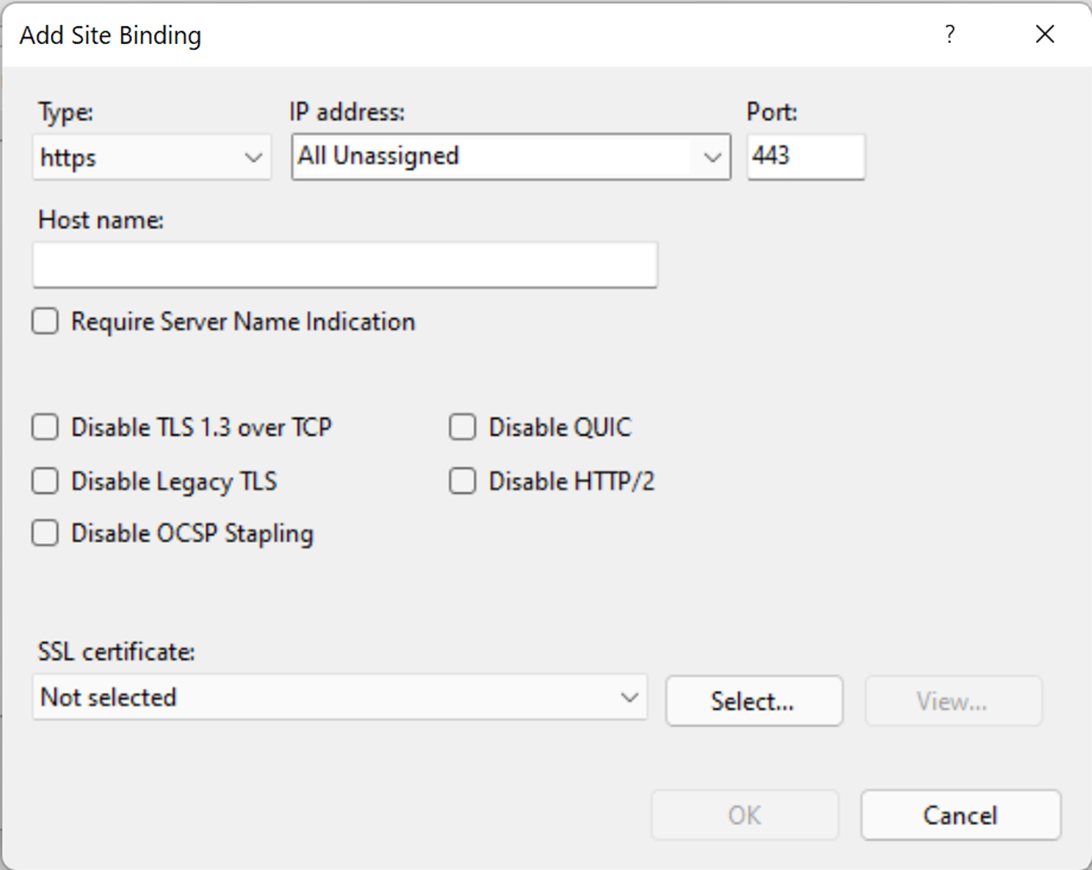
Here, select the type as HTTPS, port as 443, and IP address as “All Unassigned” if you don’t have a specific address assigned. Further, add your certificate’s file name and enable different options as per your particular requirements.
For example, TLS 1.3 is supported by all chromium-based browsers, which is why disabling it may not be a great option. However, if you are to leverage the Transmission Control Protocol (TCP), you may want to disable TLS 1.3. Similarly, other options depend on specific needs.
Once you click on “OK,” the certificate is bound to the live website. After that, you can click on the “Require Server Name Indication” option for multiple certificate binding.
Conclusion
With each iteration of the IIS manager, installing and binding SSL certificates is getting more advanced. As a result, your website is secure from several cyberattacks with enhanced security features and protection through SSL certificates. So, issuance, installation, and binding of SSL certificates become essential. To protect your customers, buy an SSL certificate from a trusted CA.