
WHM stands for Web Host Manager is a web-based application which helps manage hosting accounts on a web server. It is generally used by server administrators and resellers. It accepts requests on ports 2086 and 2087. It is designed to work integrated with the cPanel (a web hosting control panel based on UNIX).
SSL, necessary for all the websites, can be created and installed in WHM as follows:
How to Install an SSL Certificate on WHM?
Step #1: Login to your Web host Manager with your User ID and password.
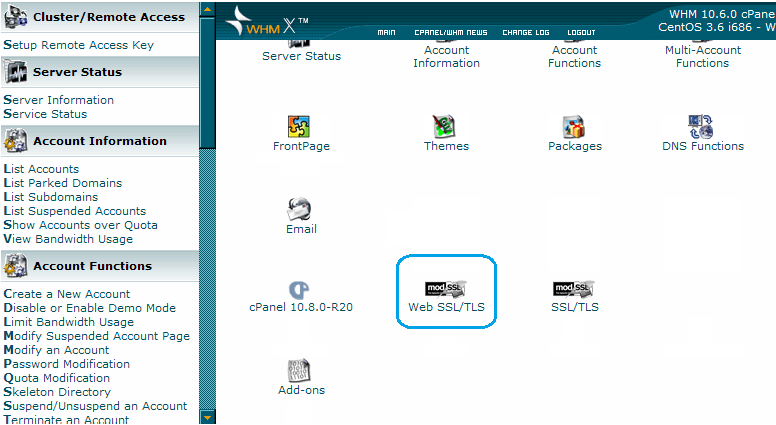
Step #2: After logging in to your WHM account, scroll down the page, which appears and click on the “Web SSL/TLS” link.
Step #3: To be able to install your domain-specific SSL certificate properly, you need to perform following three procedures.
- Generate a certificate request
- Purchase an SSL certificate
- Install the certificate
1. Generate A Certificate Request
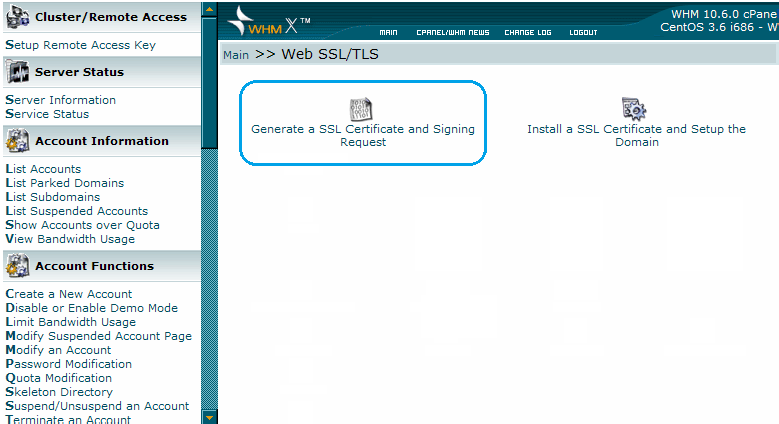
Step #1: Click on the link saying “Generate a SSL Certificate and Signing Request” which resides on the top of the window opened by clicking on the “Web SSL/TLS” link.

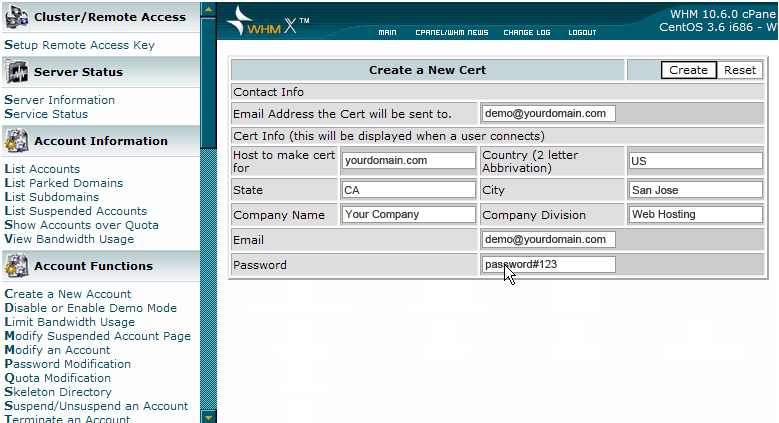
Step #2: You will see a blank form titled “Create a new Cert”. This form requires the information about the domain name for the certificate is to be issued for.

Step #3: Enter the e-mail address to which the Certificate is to be sent.
Step #4: Next enter the name of the domain for which certificate will be issued in the text box named “Host to make cert for”.
Step #5: Now submit rest of the details required in the way you want them to appear on the certificate like: Country (needs to be filled up in 2 letter abbreviated form), State (2 letter abbreviated), City (full), Company Name and Company Division.
Step #6: Enter your relevant e-mail ID and a password. After finishing up click on the Create button on the top of the form.

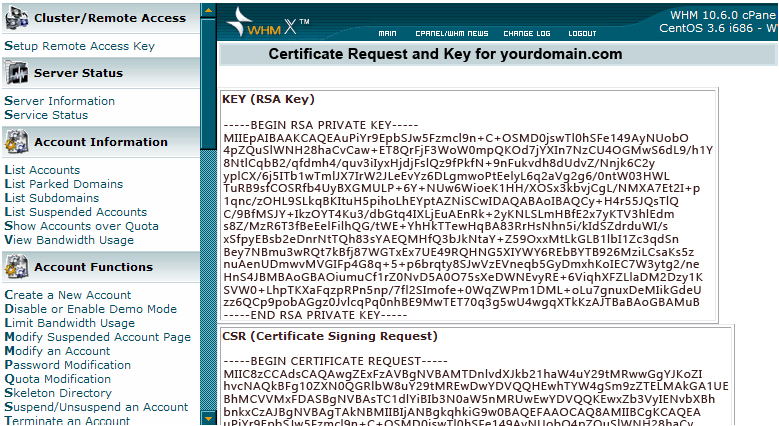
Procedure A completed! You will be able to see the Key as well as a Certificate Signing Request Key in the encrypted form.

The Keys will also be e-mailed to you on the Email ID which you provided in the previous form. It will be used at the time of the installation of the certificate.
2. Purchase SSL Certificate
You need to purchase an SSL certificate, go to the trusted SSL certificate provider and choose a certificate which is fulfills your business requirements. They will need your CSR key just created in step “A”. Once you are completed the certificate purchasing process, you should come back in WHM to install the certificate.
Certificate Name
Price
Purchase
Comodo PositiveSSL
$8.00/yr.
Buy Now
GeoTrust QuickSSL Premium
$65.25/yr.
Buy Now
RapidSSL Certificate
$12.00/yr.
Buy Now
Thawte SSL123
$33.93/yr.
Buy Now
3. Installing SSL Certificate
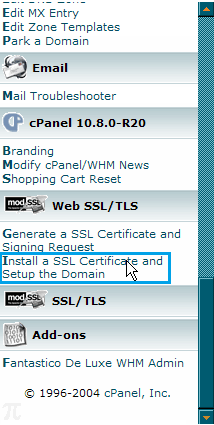
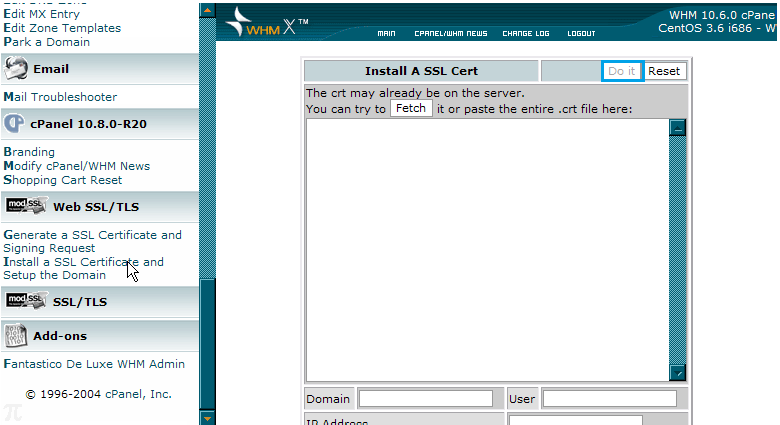
Step #1: On the same page where you saw both the keys, there is a side window. Scroll down the window and click on the “Install a Certificate and Setup the Domain” link.

Step #2: A new screen titled “Install a Cert” will appear.

Step #3: In the blank text box you need to copy paste the Certificate which you would have got an e-mail.
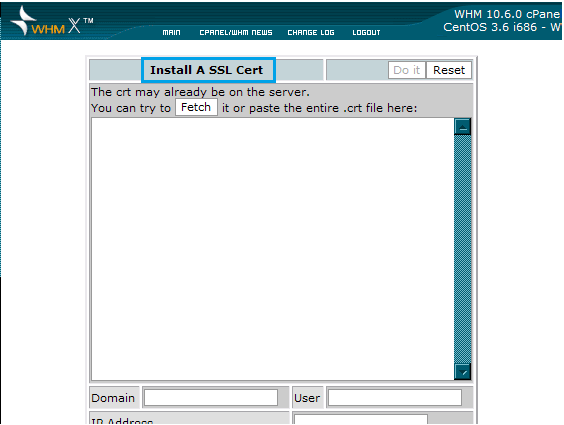
Step #4: As soon as you paste the content of the certificate the domain name, User and IP address text boxes will be filled up automatically.Note: If it is not able to fetch the data automatically then fill in the domain name, user and IP address. If you don’t know the IP address then you can find it from the List Accounts in WHM.
Step #5:Scroll down the page a little bit, and copy the Key that was created along with the CSR key.

Step #6: If you have the requirements then fill in the CA bundle text box. If you do not know what it is then leave that text box empty.
Step #7: After finishing up click on the Do it button.

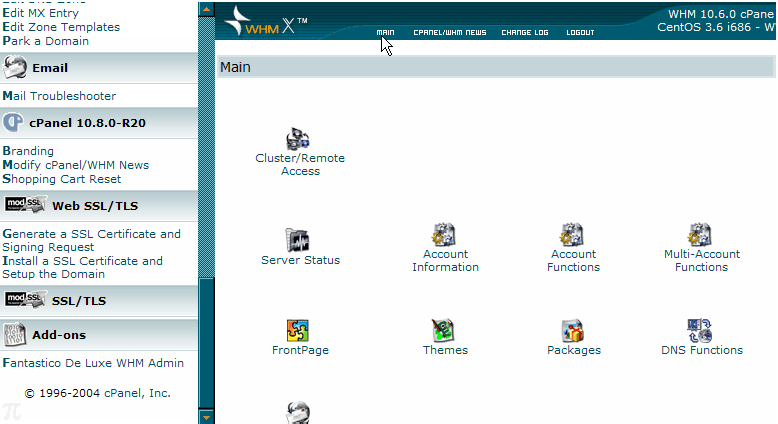
Step #8: Return to the main menu by clicking on the Main link.

Recommended Reading:
- How to Install SSL Certificate on WordPress
- How to Install SSL Certificate on NGINX Server
- How to Install an SSL Certificate on the SAP Application Server
- How to Install SSL Certificate On HostGator
- How to Install SSL Certificate on Apache2 Ubuntu Server
- How to Install SSL Certificate on WooCommerce
Step #1: Click on the link saying “Generate a SSL Certificate and Signing Request” which resides on the top of the window opened by clicking on the “Web SSL/TLS” link.
Step #2: You will see a blank form titled “Create a new Cert”. This form requires the information about the domain name for the certificate is to be issued for.
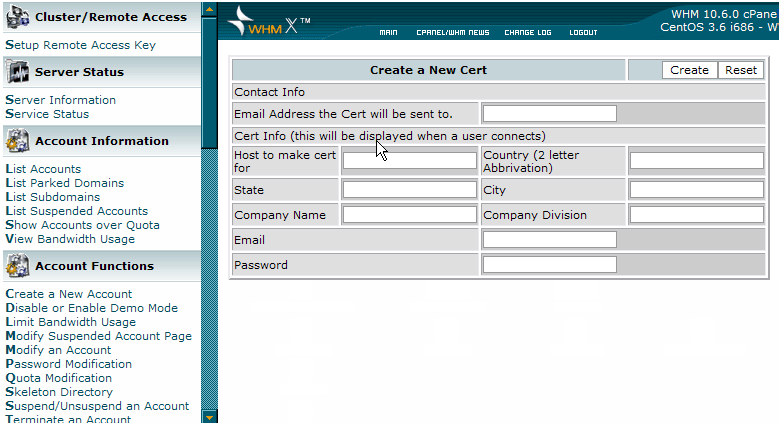
Step #3: Enter the e-mail address to which the Certificate is to be sent.
Step #4: Next enter the name of the domain for which certificate will be issued in the text box named “Host to make cert for”.
Step #5: Now submit rest of the details required in the way you want them to appear on the certificate like: Country (needs to be filled up in 2 letter abbreviated form), State (2 letter abbreviated), City (full), Company Name and Company Division.
Step #6: Enter your relevant e-mail ID and a password. After finishing up click on the Create button on the top of the form.
Procedure A completed! You will be able to see the Key as well as a Certificate Signing Request Key in the encrypted form.
The Keys will also be e-mailed to you on the Email ID which you provided in the previous form. It will be used at the time of the installation of the certificate.
2. Purchase SSL Certificate
You need to purchase an SSL certificate, go to the trusted SSL certificate provider and choose a certificate which is fulfills your business requirements. They will need your CSR key just created in step “A”. Once you are completed the certificate purchasing process, you should come back in WHM to install the certificate.
| Certificate Name | Price | Purchase |
|---|---|---|
| Comodo PositiveSSL | $8.00/yr. | Buy Now |
| GeoTrust QuickSSL Premium | $65.25/yr. | Buy Now |
| RapidSSL Certificate | $12.00/yr. | Buy Now |
| Thawte SSL123 | $33.93/yr. | Buy Now |
3. Installing SSL Certificate
Step #1: On the same page where you saw both the keys, there is a side window. Scroll down the window and click on the “Install a Certificate and Setup the Domain” link.
Step #2: A new screen titled “Install a Cert” will appear.
Step #3: In the blank text box you need to copy paste the Certificate which you would have got an e-mail.
Step #4: As soon as you paste the content of the certificate the domain name, User and IP address text boxes will be filled up automatically.Note: If it is not able to fetch the data automatically then fill in the domain name, user and IP address. If you don’t know the IP address then you can find it from the List Accounts in WHM.
Step #5:Scroll down the page a little bit, and copy the Key that was created along with the CSR key.
Step #6: If you have the requirements then fill in the CA bundle text box. If you do not know what it is then leave that text box empty.
Step #7: After finishing up click on the Do it button.
Step #8: Return to the main menu by clicking on the Main link.
Recommended Reading:
- How to Install SSL Certificate on WordPress
- How to Install SSL Certificate on NGINX Server
- How to Install an SSL Certificate on the SAP Application Server
- How to Install SSL Certificate On HostGator
- How to Install SSL Certificate on Apache2 Ubuntu Server
- How to Install SSL Certificate on WooCommerce