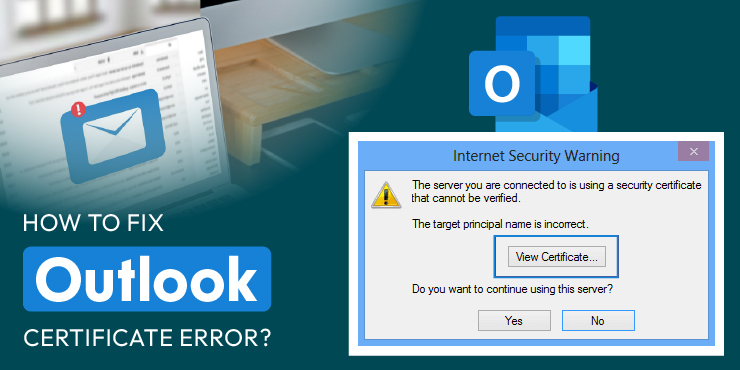
MS Outlook is loved by email clients all over the globe since it is efficaciously managing all the activities of emails. Generally, this is a smooth and hassle-free process, but sometimes it triggers errors. There can be multiple reasons that cause Outlook certificate error and other alerts.
What is an Outlook Certificate?
An Outlook certificate is an X.509 digital certificate that uses encryption technology to encrypt Outlook emails. This is done using the PKI (public key infrastructure).
These certificates are also termed S/MIME (Secure Multipurpose Internet Mail Extensions) certificates, email encryption certificates, or an Outlook digital security certificate.
What is Outlook Certificate Error?
There is one main reason which pops Outlook error. Generally, this Outlook error is displayed when a user is trying to connect to an unsecured mail server.
This is a warning alert for users stating that the SSL/TLS (Secure Socket Layers/Transport Layer Security) certificate installed on the server is invalid or Outlook security certificate has expired.
An Outlook error can occur due to many other reasons too. Let us have a look at some of the major ones.
Why Do I Encounter Outlook Certificate Errors?
1. As stated above, the foremost reason for the display of the Outlook error is due to an invalid security certificate stationed on the server. When the user tries to connect Outlook with the invalid server, it is bound to display the error message.
2. Incorrect date and time are another major factor that causes varied errors including the Outlook error. Each digital certificate (SSL) comes with an expiry date. When this expiry date is crossed, the certificate becomes invalid and the Outlook displays a warning alert.
3. Each SSL certificate secures specific domains which are linked to servers. Any modification in the domain name by the ISP (Internet Service Provider), requires changes in the certificate’s domain name too. If the certificate is not updated with the new domain name, it can trigger an Outlook error.
4. Entering an incorrect hostname can also cause an error display. When a new email account is added to Outlook, it’s vital to verify the hostname and ensure that the same is correctly entered. If a wrong hostname is added to the email account it may fail to connect the server with the email client.
How do I Trust a Certificate in Outlook?
An Outlook certificate is an indicator of an authentic email server that is used by the recipient. In this era, where phishing attacks are always rising, an Outlook certificate ensures a safe and secure experience for its users.
In case of any mismatch in the domain names, port names/settings, hostnames, etc. this certificate will not only display an error but also prove to be risky and non-trustworthy.
How do I Fix the Outlook Certificate Error?
1. Verify the Certificate Name:
In case of an Outlook error, the first step is to ensure that the certificate name and the name stated on the email server are the same or not. For an error-free connection between both these parties, the name of the certificate must match with that stated on the email server.
Steps to Verify the Name:
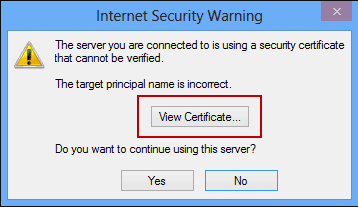
Step 1: On the Outlook error popup screen, click “View Certificate”
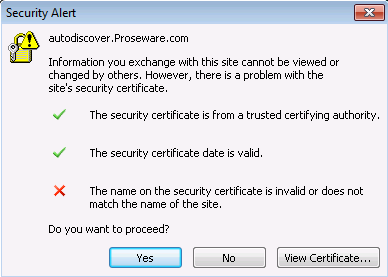
Step 2: Go to the “Issued to Name” option and verify whether the name stated on the certificate is the same as that on the mail server or not.
Step 3: In case they are different, rectify it and restart Outlook.
Step 4: Check if the error is fixed or not.
Note:
In case of multiple names mentioned on the certificate, check out each hostname one by one. If they mismatch, the mail server is incorrect. Contact your ISP for the correct mail server and fix the error.
2. Change the Outgoing SMTP Port:
In some cases, ISPs block the outgoing SMTP port which triggers the Outlook error. The only solution is to relocate the server from the blocked port to another functioning port for resolving the issue.
Steps:
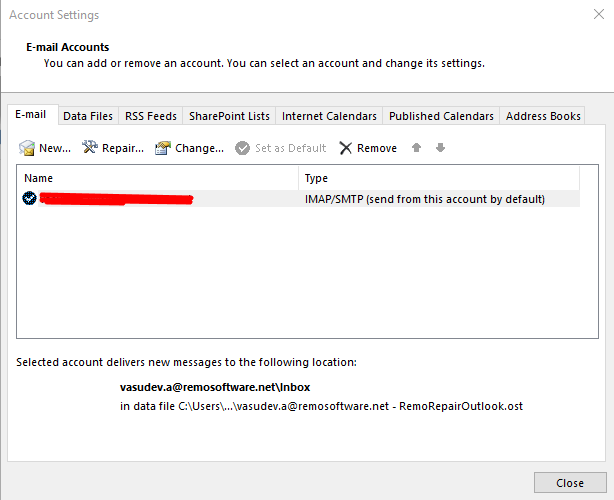
Step 1: Open MS Outlook > click the “File” option > select “Info” tab > go to “Account Settings”
Step 2: Select your email account and press “Change”
Step 3: Click “More Settings” > go to the “Advanced” tab.
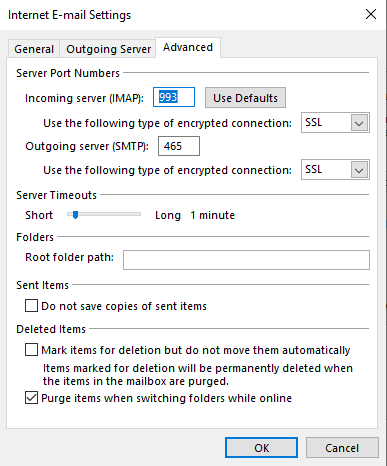
Step 4: Modify the outgoing server (SMPT) port to 465, and save the changes by clicking OK.
Step 5: Restart Outlook and check for the error.
3. Use Unsecured Port:
Some institutions may block mail servers like IMAP 993, SMTP 465, etc. for security reasons. In such cases, fixing the Outlook error by using unsecured ports (non-SSL ports) like POP 111, SMTP 587, etc. can work positively.
Note: Nonsecured ports are risky and are prone to cyber-attacks.
4. Use the Domain Name of your Hosting as Mail Server:
Multiple domains are hosted by the hosting providers. When users opt for shared hosting, these hosting providers offer the same servers for varied domains.
This creates a security lapse since these providers miss out on renewing SSL certificates for each domain. Hence, it is advisable to use the domain name of the hosting company as the mail server rather than opting for your domain name.
How to Install Security Certificates in Outlook?
Your Email Signing Certificate:
Download your email signing certificate from Internet Explorer, and save the same on your device as a .PFX file. Always remember the file path for carrying out the installation procedure.
Your Password:
After saving your certificate file, a password needs to be entered. Go for a strong password and remember it, since it will be needed for the below-stated installation process.
Installation Instructions for Outlook 2010/2013/2016:
To install the encryption certificate in Outlook, follow the procedure as stated below.
Step 1: Open Outlook > Go to “File” > Click “Options”
Step 2: The “Outlook Options” window will pop up. In this window, go to “Trust Center” > select “Trust Center Settings”
Step 3: The “Trust Center” window will open. Go to the “Email Security” tab.
Step 4: Click the Digital IDs (Certificates) tab on the right-hand side. Click on “Import/Export” and its window will pop up.
Step 5: In the “Import/Export Digital ID” window, select the option stating “Import existing Digital ID from a file”
Step 6: Click “Browse” go to your file’s location and later click “Open”. The file path will be visible in the “Import File” field.
Step 7: Enter the password, which you used to download the file and later click “OK” to save all the changes.
Step 8: Another dialogue box will pop up. Click OK.
Step 9: In the “Trust Center” window, go to “Email Security” > click “Settings”
Step 10: The “Change Security Settings” window will pop up on the device screen. Fill in the “Security Settings Name” in the blank field.
Step 11: Click “Choose” located in front of “Signing Certificate” and load your certificate. Later click “OK” to confirm the certificate window.
Step 12: Repeat the same procedure for the “Encryption Certificate” field. Later click OK to save the changes.
Step 13: After the “Change Security Settings” window is closed, select the desired options you wish for by ticking the checkboxes located under the “Encrypted email Tab”
Step 14: Click OK and the “Trust Center” window will be closed.
Congrats!! Your Outlook Certificate is installed and ready for use.
How to Sign Your Emails Using Your New Outlook Email Encryption Certificate?
For all who are ignorant, let me brief you on the use of this email certificate, once the installation process is over.
To secure your emails:
Step 1: The “Trust Center” window will open. Go to the “Email Security” tab.
Step 2: Open Outlook > Go to “File” > Click “Options” > “Outlook Options” > go to “Trust Center” > select “Trust Center Settings”
Step 3: The “Trust Center” window will pop up. The default tick lies at “Send clear text signed message when sending signed messages.
Step 4: In Email Security,> Encrypted Email, tick “Add digital signatures to outgoing messages” to digitally sign all email messages.
Step 5: To verify whether the digitally signed message is original and not compromised, tick the option “Request S/MIME receipt for all S/MIME signed messages”
Step 5: Click OK to save the changes.
Wrapping Up:
Hope this blog will help eliminate the Outlook error (if any) by implementing the above-stated solutions. Always add digital signatures to emails and encrypt them to keep your emails and their data safe and secured from prying eyes.