Step by Step Guide to Digitally Sign a PowerShell Script For Your Windows Machine.
Automation has helped businesses reduce repetitive tasks and improve productivity. Regarding Windows, PowerShell is one of the most popular object-oriented automation engines that provides an interactive command-line shell. In other words, it provides developers with the power of automation through a simplified scripting language.
PowerShell scripts provide granular control for Windows system management and automation. However, PowerShell scripts are also susceptible to several cyber attacks. For example, some top cyberespionage communities like APT1, Duqu, or Smoke Loader Trojan exploit PowerShell to compromise Windows systems.
So, how to protect your systems from such attacks?
One of the best ways to ensure PowerShell security is to apply a code signing certificate to your machine. When you digitally sign a PowerShell script, it ensures that hackers can’t access code in a plain script for manipulation.
Let’s understand the process of signing PowerShell scripts in a step-by-step guide.
Signing a PowerShell Script – What do You need to Know?
PowerShell has built-in data protection features, which are activated through script execution. In addition, it has a .ps1 file type associated with the notepad, which means a user can’t execute any script accidentally.
Another aspect you need to understand before signing PowerShell scripts is the built-in restrictions based on the Windows OS. For example, Windows 8.1, Windows 10, and Windows Server 2012 restrict specific PowerShell scripts.
Similarly, Windows Server 2012 R2 and Windows Server 2016 TP4 allow the creation of scripts locally, but each one needs a digital signature. So, if you want to sign the PowerShell script and execute it digitally, you need to change the execution policy.
So, how will you change the restriction policy?
Here are some group policies that you can use,
- AllSigned policy allows all the locally downloaded or created scripts to run
- The unrestricted policy allows all the unsigned scripts to run with a prompt asking for the user’s confirmation
- The bypass policy allows unsigned scripts without a prompt for user confirmation
There are specific elements in every script that affect the entire execution policy. For example, the “Process” element involves all the current PowerShell sessions.
Set-ExecutionPolicy -ExecutionPolicy Bypass -Scope Process
The above example shows how the Bypass policy is used to execute the PowerShell script. However, group policy execution for your PowerShell script is just one aspect of signing PowerShell scripts.
For example, if you want a PowerShell sign script for your Windows machine, the first step will be to buy a or renew code signing certificate. It allows users to secure their Windows machine from man-in-the-middle attacks. Further code signing certificates also help maintain the integrity of PowerShell scripts from hackers and attackers.
Now that we have discussed why you need a digitally signed PowerShell script let’s discuss how to do it!
How to Sign a PowerShell Script?
Code signing certificates can be purchased from leading certificate authorities(CA) like Comodo SSL, DigiCert SSL etc. CAs are trustworthy organizations that issue code-signing certificates after validating the requestor’s identity.
1. Buy Code Signing Certificate from ClickSSL
Buying a trusted code signing certificate ensures better security for your PowerShell scripts. You can choose any of the CAs to request for code signing certificate we discussed above. Here is the process to follow,
- Generate a certificate signing request(CSR) and submit it to the CA with all the details
- CA will verify all the details and issue a code-signing certificate
- Download and install the certificate on your Windows machine
However, it is essential to understand that self-signed certificates need to be more secure, and purchasing a code-signing certificate is crucial for the security of Windows machines.
2. Open Your Windows PowerShell
Code signing PowerShell script requires users to access the “Windows PowerShell” on their device.
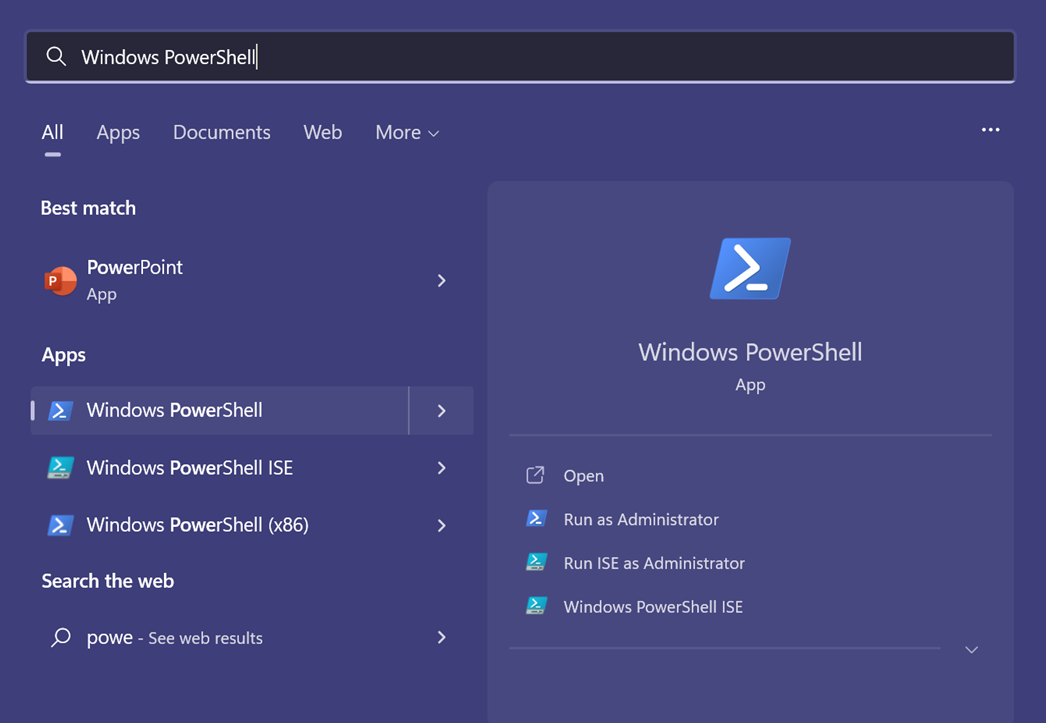
Click on open, and your PowerShell administrator panel will open. Next, you must find your code signing certificate from the device and install it through the script.
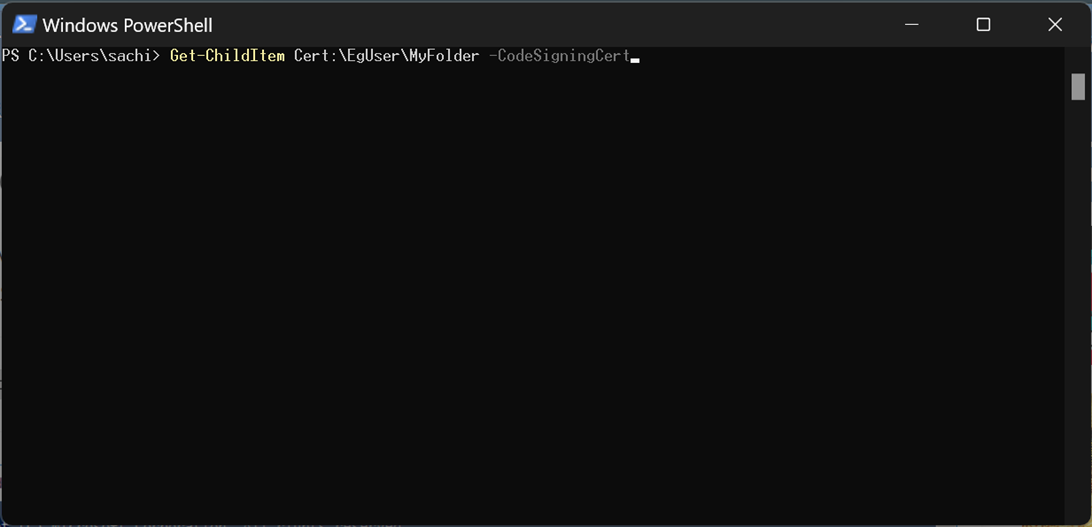
3. View Your Code Signing Certificates and Select One to Use
The next step is to find the code signing certificate you want to use and execute the following script,
Get-ChildItem Cert:\EgUser\MyFolder -CodeSigningCert
Next, enter the path to your code signing certificate by using the following script,
cd Cert\EgUser\MyFolder
Type ls and press Enter
Further, you can bring all the code signing certificates by using the following command,
Get-ChildItem Cert:\EgUser\MyFolder

Hit enter
Once you have the list of certificates, choose the one you want to digitally sign the PowerShell script.
4. Sign Your PowerShell Script
The next step is to complete the process of achieving the PowerShell sign script. First, save the $cert and start signing it to the script. Further, you can use the following command to code sign the script,
Set-AuthenticodeSignature -FilePath C:\CodeSigningCertificate\eg_powershell_script.ps1 -Certificate $cert
Once you complete signing the PowerShell script, timestamping becomes crucial. It allows your signing certificate to be valid even after expiry. Use the following command for timestamping,
Set-AuthenticodeSignature -FilePath C:\CodeSigningCertificate\eg_powershell_script.ps1 -Certificate $cert -TimeStampServer https://timestamp.
Here Comodo is the certification authority for your code signing certificate. You can change it according to the Certificate Authority from which the code signing certificate was issued.
5. Verify Your PowerShell Script Signing
Now that you have the code signing in the PowerShell script, it’s time to verify it. First, open your code-signed script using a notepad and check for a signature block “#SIG#” at the beginning and end.
You can also use a command to verify the code-signed PowerShell script. Use the following command in Windows PowerShell,
Get-AuthenticodeSignature -FilePath PATH_OF_PowerShell_SCRIPT | Select-Object -Property *
Why Should I Sign My PowerShell Script?
Signing the PowerShell script is vital to protect your system against cyber attacks like man-in-the-middle(MITM), malware, ransomware, etc. Code signing certificates use encryptions that scramble the PowerShell script data and make it anonymous for hackers.
The digital signature ensures that scripts are hard to manipulate for root admin access. Hackers can access the admin panel and hold the system for ransom. However, signing PowerShell scripts avoids such attacks.
Final Thoughts on How to Sign a PowerShell Script
PowerShell scripts come with built-in security features and can be susceptible to attacks. So, it becomes vital to code-sign the PowerShell scripts and protect them from MITM attacks. The best aspect of PowerShell sign scripts is timestamping, which ensures your certificate is valid even after expiry. So, start signing your PowerShell scripts and ensure enhanced Windows security.
Related Resource: